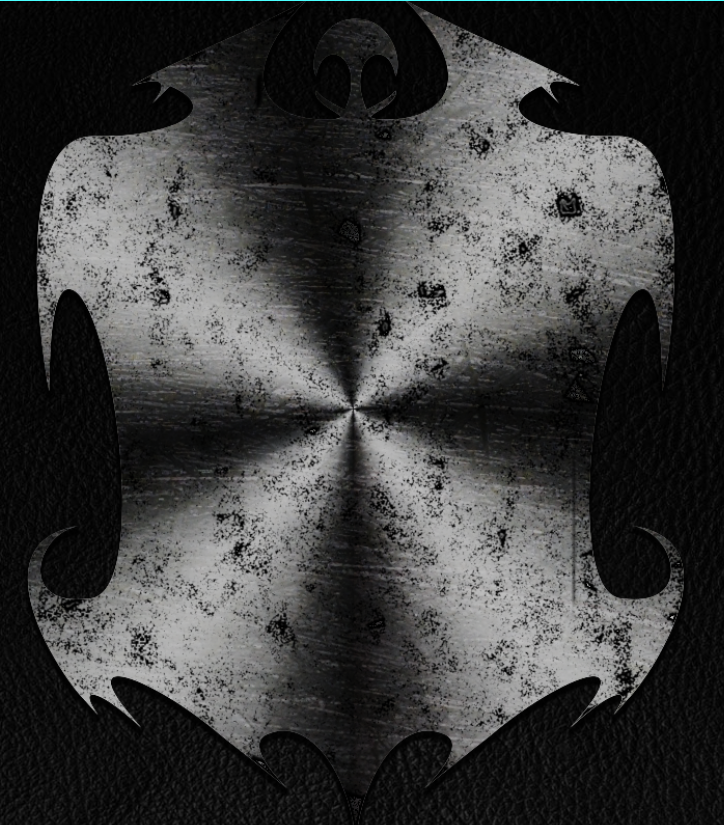
I used the pen tool (for a vector image) to draw the outline of a shield but quickly ran into problems as I am not very skilled with this particular tool, so I placed an outline of a shield into the document as a template but I was still having trouble getting the lines perfect against the shape so I decided to go with my own design. After a making a basic outline, I started tweaking anchor points and finished with a design that looked completely different to the one I had used as a template but I prefer my design as it encapsulates the idea of fantasy. To prevent inconsistencies with my design, I drew only half of the shield allowing me to flip it horizontally and match it against the other half forming the full shield. Finally, I removed the line in the middle by using the direct selection tool, selecting the line and the pressing delete.
Initially I placed the outline into Adobe Illustrator and used the offset tool (Object - Path - Offset patch) to shift the design inwards -1mm.However this didn't create one solid outline, I deleted the offending edges and used the pen tool to draw a line between the anchor points and then tweaked them until they followed the curve of the outer shield outline.
I placed the outline back into photoshop and followed this tutorial adapting it to my own design. I did use different textures that I felt fitted my shield and overall design better than the guide's suggestion. To finish I used the soft oil pastel brush to draw over the shield design, this gave some texture to the shield and because I didn't 100% cover the shield, the gaps appear to be marks on the shield giving it a "battle worn" appearance. Although not evident on the picture below, I did add an inner bevel.
(Smooth technique, 500% depth, down direction, both size and soften at 5px, 90 degree angle, 30 degree altitude, default contour, grey highlight and shadow modes with 80% opacity)
However, the lighting doesn't match the rest of my cover, I have lighting at a 30 degree angle whilst this looks as if the light is shining directly in the middle and even after trying to move the reflections around it doesn't look authentic. I have researched making a chrome texture that will reflect an image in a realistic way, if I can create this is will look very realistic and fulfill the image I am trying to achieve.
Quick google - http://tinyurl.com/qzgvecn
The tutorial - http://abduzeedo.com/captain-america-shield-photoshop


No comments:
Post a Comment